
Evaluation time!
I feel that I have learnt so much throughout this unit – I have not only learnt how to construct three garments that I had never made before and the final piece in a style and method that I had not practised before, but I have also been taught the vitality of maintaining a high standard of work by avoiding handling the material too much and taking time and care when working. By trying to maintain a workroom attitude I have been given a glimpse into working in such a way in the industry, which has given me a more professional outlook and goal for my work when completing a project.
The two garments I struggled with least were the waistcoat and the chemise. With the waistcoat I only had one issue when I had sewn the back pieces to the front pieces – once I had bagged them out I had realised that the drawstring tabs were on the inside of the back piece rather than the front. This situation was easily resolved by unpicking these and transferring them on to the back of the waistcoat, as this was quicker than unpicking the entire waistcoat to flip the back pieces round. In future I will need to carefully consider how the waistcoat will turn out in this situation before anything is sewn permanently. The only small issue I had with the chemise was the material – it was so fine that any chalk lines were easily seen and any pins and stitch lines badly bruised the fabric. I countered this by using white chalk, using as few pins as possible and carefully sewing each piece together so as not to make any mistakes. This was a valuable lesson in assessing the material before working on it and taking the best steps towards creating a beautifully made piece of clothing.
I struggled more with the breeches and shirt. The breeches were the first piece of clothing I made for this project and I felt slightly overwhelmed as I had never made a pair before. I had made a few mistakes in the construction of the garment, such as the waistbands and kneebands being slightly uneven and the arrowheads on my front flap opening fraying. The majority of the time these issues just needed to be unpicked and re-sewn with more care, or otherwise completely removed and re-made. Thanks to the feedback from my tutor and help from my peers I was able to overcome any issues that arose and any queries that I had. With the shirt I felt more pressured to complete the garment in time due to only having a week to complete it. This was down to my poorer judgement of my time, which I should have resolved with my time plan and constantly referring to it. I believe that this is a vital point I need to keep in mind in the future. Due to this pressure I feel that I have not taken as much care with this piece as I should have. It did not help that nearing the completion of my collar I had issues with three different sewing machines that refused to work. Once again I will need to allow myself more time to complete a garment like this for the first time in order to ensure that I do not make any mistakes. It comes as some relief that I will be able to go back to these pieces after I have handed them in to improve their quality, which urged me on to completing the garments as opposed to simply leaving them partially finished.
I feel that I have personally developed as a maker during this project – I have learnt the necessity of keeping costumes as crisp as possible in their quality, how to improve the quality of my sewing and that time planning is the most crucial part of a project when a fixed deadline looms on the horizon. I can honestly say that I will take these experiences away with me on to my future projects and that I hope the quality of my work will drastically improve thanks to this project.
Tuesday, 17 May 2011
Shirt...finished!
 ...and so I have finally reached my last garment for the National Theatre's Hire Department, and once again I found myself with a bit more of a challenge than I had been given with the waistcoat and certainly the chemise.
I originally started with a quick tutorial with Dexter to outline the basic process for making the shirt: First the front opening would need to be constructed, then the back would be gathered and applied to the yolke to then be attacked on to the front. The sleeves and cuffs would then be constructed and sewn together before sewing the godae onto the main body of the shirt and attaching the sleeves. Finally the collar would be constructed and the shirt would be overlocked and hemmed. I was advised by a fellow student to take care when attaching the yolke as the stitch lines needed to be as straight as possible and it was very easy to mess this up.
 The shirt was gathered at the back...
 ...and the cuffs.
 The collar had a pleated detail, and the front was buttoned up with four buttons.
 The added godae allowed for extra arm movement during the 18th Century.
I had not anticipated the amount of work that would need to go into this garment - if I had forseen this I would have tried to allow myself more time to make this, like giving myself two weeks rather than one. This sense of short time is what has pressured me into leaving more mistakes than I would have liked - where faults occured I did my best to rectify them, but if they persisted I left them in the best state I could as I would rather hand in a more completed shirt than have a partially completed shirt with highly bruised fabric and the signs of last minute stress on it! Again, the best way to resolve this would be to plan my time much better and refer to my time plan constantly to review whether I am on track with my work or not.
Once I had completed my shirt I unfortunatly noticed that the front piece was uneven and would bulge out once the shirt was buttoned up. To rectify this I feared I would have to pull apart the entire shirt, so I decided to leave this error.
It comes as a relief to me that after our hand in we shall recieve further feedback from our tutors to rectify any issues with the garments so that they are at an acceptable standard to hire out.
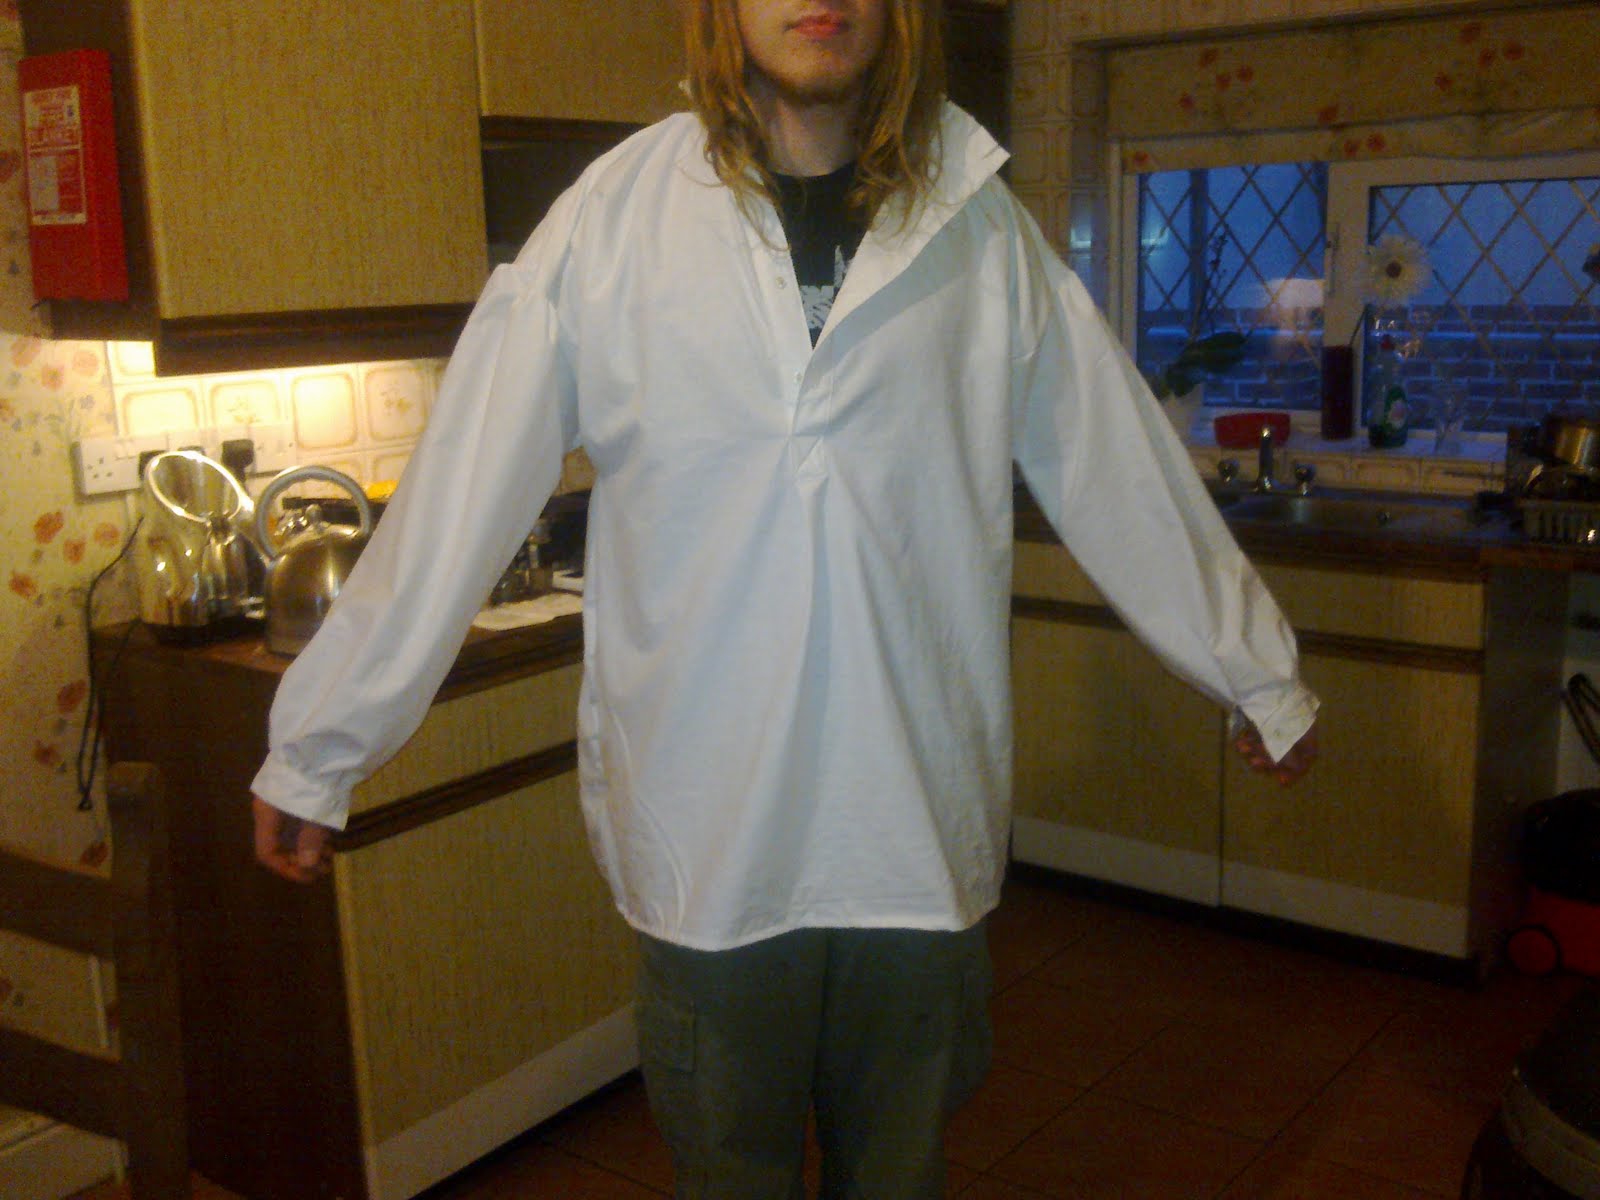 (Luckily I had my housemate's Coffee Viking on hand to borrow to model the completed shirt...I feel that Apocalyptic Metal and pillaging and the 18th Century don't fit so well together).
 Overall I am pleased with the outcome of my shirt, though I look forward to seeing which areas I need to improve in order to make it a good enough quality for the National Theatre Hire Department.
Tuesday, 10 May 2011
Chemise...done!
Due to lack of time (horray for Royal Weddings, bank holidays and what-not) I was required to change my work schedual slightly - trying to squeeze as much making as possible into the last week before handing in my pieces. Luckily I was able to borrow a small domestic sewing machine for the time that I was in London on work experience which saved me some time and took off the pressure of having to make two garments in a week. Obviouslt to overcome this I need to look back over my time plan at least once a week to ensure that I am on target with my work and not in danger of running out of time.
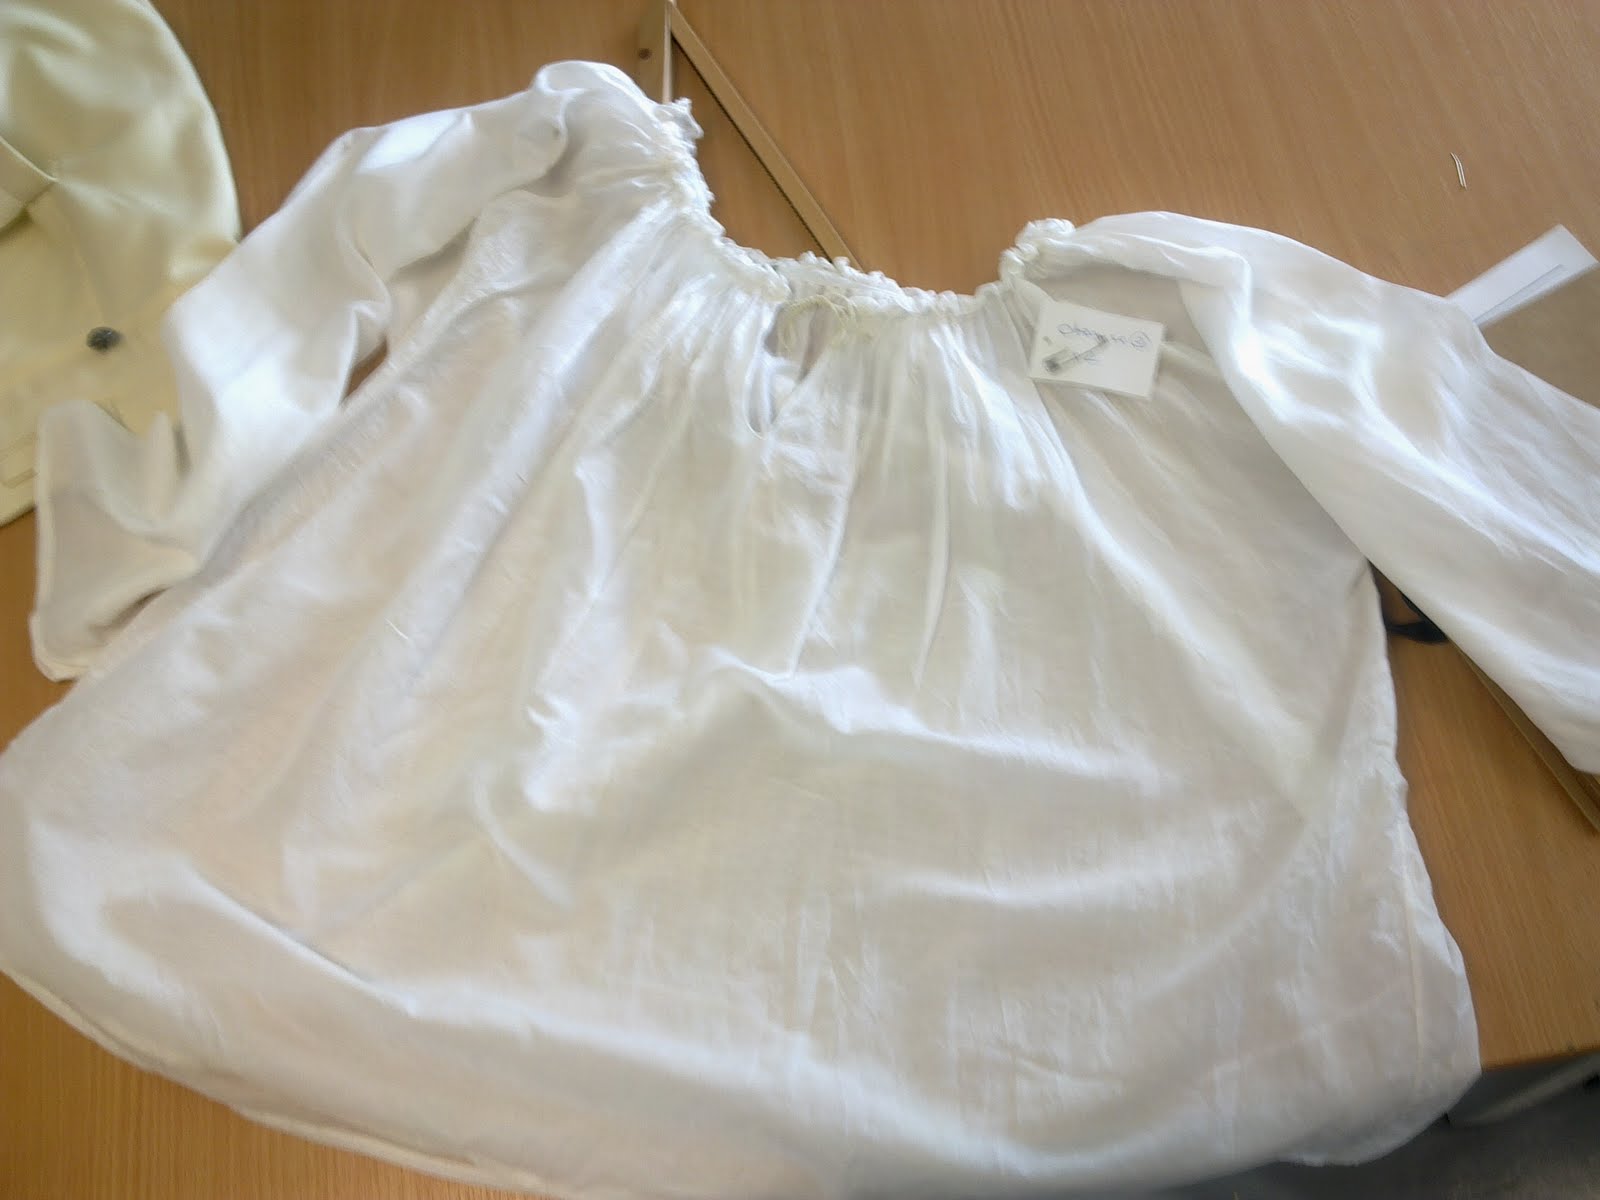
 When working away from the studio I had a rough idea of what the garment should look like - pretty much all of the seams were french seams with only the godae straight stitched in and overlocked.
 The neckline seemed to be gathered then applied onto cotton tape with elastic. For my piece I just used elastic to create the same effect. A small zigzag stitch was used to gather the material edge to neatly finish off the raw edge of the material.
 The only problems I encountered with this garment were with the material - it was so thin that it was impossible to mark with coloured chalk and using pins bruised the material too much. I overcame this by using white chalk to mark out the design lines and used as few pins as I could possibly manage. Due to the fineness of the material it had a tendancy to bunch up under the sewing machine, emphasising that it is always vital to test a scrap piece of material under the machine to test the stitch tension and to ensure that the material will be able to handle going through the machine.

The chemise took two days to make, which was surprising as I had expected it to take longer. As I did not have the sample to refer to when making the chemise it is not an exact replica of the original - the only difference is that the french seams are not as fine as the sample chemise, however these could easily be altered if necessary.
 When working away from the studio I had a rough idea of what the garment should look like - pretty much all of the seams were french seams with only the godae straight stitched in and overlocked.
 The neckline seemed to be gathered then applied onto cotton tape with elastic. For my piece I just used elastic to create the same effect. A small zigzag stitch was used to gather the material edge to neatly finish off the raw edge of the material.
 The only problems I encountered with this garment were with the material - it was so thin that it was impossible to mark with coloured chalk and using pins bruised the material too much. I overcame this by using white chalk to mark out the design lines and used as few pins as I could possibly manage. Due to the fineness of the material it had a tendancy to bunch up under the sewing machine, emphasising that it is always vital to test a scrap piece of material under the machine to test the stitch tension and to ensure that the material will be able to handle going through the machine.
The chemise took two days to make, which was surprising as I had expected it to take longer. As I did not have the sample to refer to when making the chemise it is not an exact replica of the original - the only difference is that the french seams are not as fine as the sample chemise, however these could easily be altered if necessary.
Wednesday, 4 May 2011
Shirt - Research.
The shirt has been an essential undergarment for men throughout history and has slowly developed over time whilst maintaining a couple of main aspects. The sleeves have always remained long and the shirt length no longer than hip length. Around the 18th Century gussetts were added to the shirt sleeves to allow extra movement, and the collar was shortened to touch the jaw line rather than the cheeks to allow a more free movement for the head. A high standing collar (much like my design) would usually have a cravat tied beneath it.

 From The History Of Underclothes by C. Willett Cunnington, 1981.

 From The History Of Underclothes by C. Willett Cunnington, 1981.
Monday, 2 May 2011
Waistcoat...completed!
So my waistcoat took me once again about 2 weeks to complete. Thanks to my realisation that I have less time that I thought I sis I am now slightly behind schedual...time to pick up the pace!
Constructing my waistcoat felt considerably smoother than the process for making the breeches had been as I had previously make a waistcoat at the beginning of the year in tailoring whereas I had never made a pair of breeches before. I used the notes that I had written for my tailored waistcoat as a rough guide for constructing my military one, for example using it as a reminder on how to put the lining together and apply the facing. As the military design was quite different from the tailored design I sometimes struggled to transfer the instructions across.
I once again used The National Theatre's example to ensure that the quality of my work was up to their standard and that my methods were similar to their own.


 After carefully examining all of the details I started work on my own piece, constantly referring back to the sample.

The only major issue that I encountered was that once I had sewn the back pieces to the front pieces and bagged them out I had realised that the drawstring tabs were on the inside of the back piece rather than the front. It was easier and quicker to unpick these and transfer them on to the back of the waistcoat rather than unpicking the entire waistcoat to flip the back pieces round. In future I will need to carefully consider how the waistcoat will turn out in this situation before anything is sewn permanently.

Overall I am extremely satisfied with my waistcoat, I feel that the quality of my making is improving since the breeches I constructed as I am getting into a habit of caring for my fabric, avoiding handeling it too much and ensuring that my stitching is as neat and secure as possible.
Constructing my waistcoat felt considerably smoother than the process for making the breeches had been as I had previously make a waistcoat at the beginning of the year in tailoring whereas I had never made a pair of breeches before. I used the notes that I had written for my tailored waistcoat as a rough guide for constructing my military one, for example using it as a reminder on how to put the lining together and apply the facing. As the military design was quite different from the tailored design I sometimes struggled to transfer the instructions across.
I once again used The National Theatre's example to ensure that the quality of my work was up to their standard and that my methods were similar to their own.


 After carefully examining all of the details I started work on my own piece, constantly referring back to the sample.
The only major issue that I encountered was that once I had sewn the back pieces to the front pieces and bagged them out I had realised that the drawstring tabs were on the inside of the back piece rather than the front. It was easier and quicker to unpick these and transfer them on to the back of the waistcoat rather than unpicking the entire waistcoat to flip the back pieces round. In future I will need to carefully consider how the waistcoat will turn out in this situation before anything is sewn permanently.

Overall I am extremely satisfied with my waistcoat, I feel that the quality of my making is improving since the breeches I constructed as I am getting into a habit of caring for my fabric, avoiding handeling it too much and ensuring that my stitching is as neat and secure as possible.
Sunday, 1 May 2011
Chemise - Research.
The chemise is an undergarment that is tiypically warn underneath all other garments, even under the corset, bodice or stays. The chemise was first about in the late 1400s in a style that was similar to the male shirt - with a collar, opening at the front tied with a drawstring. They later varied from having no sleeves to having long sleeves, and gussets were later added to allow more movement. The garment had no embellishments for the lower classes as it was a garment completly hidden from view, aside from the collar and sleeves if they were chosen to be shown. Only the upper classes used embroidery to represent their wealth.

 From The History Of Underclothes by C. Willett Cunnington, 1981.
 From The History Of Underclothes by C. Willett Cunnington, 1981

 From The History Of Underclothes by C. Willett Cunnington, 1981.
 From The History Of Underclothes by C. Willett Cunnington, 1981
Subscribe to:
Posts (Atom)
